Make my face
If you have gone through Disneyland's Haunted Mansion ride, you may remember the talking head statues. As you walked past them, it appeared as if they turned to follow you. If you looked closer, you observed that the statues didn't stick out toward you like normal statues but were instead concave, carved inward. [I made one of these. See the very end of this post for a short movie.]
A couple weeks ago, my brother showed me a color drawing of a dragon head on a flat piece of paper and showed me a movie of the dragon head.
I followed instructions on where to cut, how to fold, where to tape, and soon I had my dragon head. It followed the same principle as the heads at the Haunted Mansion: the dragon face was on the "inside" of the 3D shape. And if you shine a light just right and close one eye and walk by it, it looks like the dragon is turning its head to follow you. Creepy.
I thought why not try to make a creepy 3D thing with my face?
Here is the folded object:
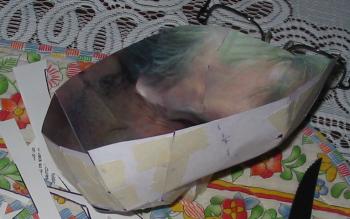
And here is a movie (click the triangle) that shows the resulting optical illusion (hmm... I look like a balloon with a really bad nose burn):
(Thanks, David, for converting this from my camera's movie format!)
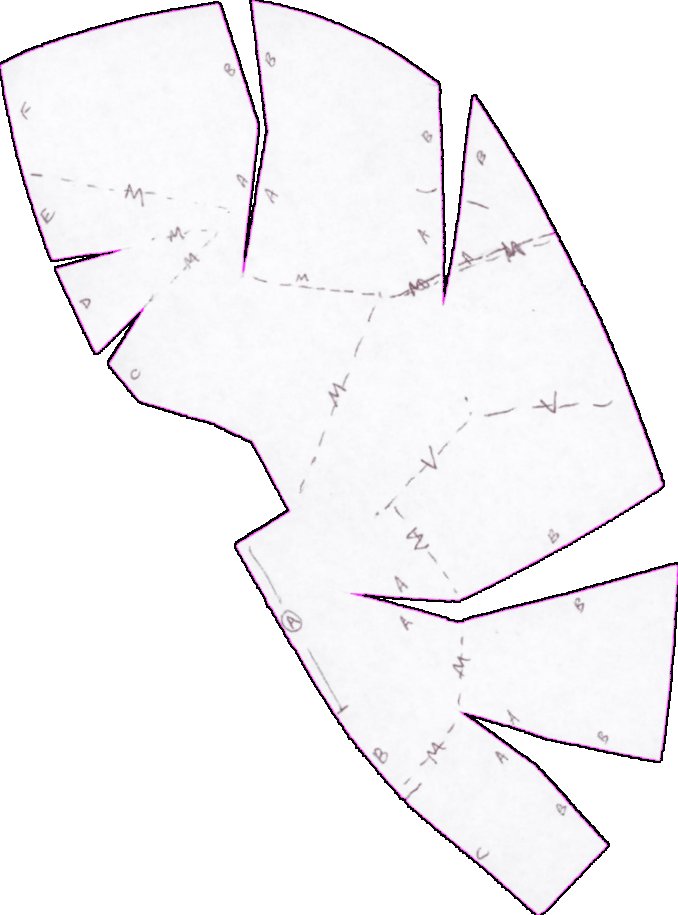
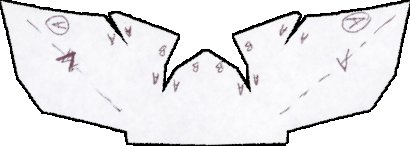
You can make it, too, as if that's exciting. Print out the following six images. Instructions are on one of them.

If you succeed, leave me a comment! I'm curious if anyone else (1) tries it and (2) succeeds. I uploaded my movie to video.google.com.
So, how did I make it, you craftspeople wonder...
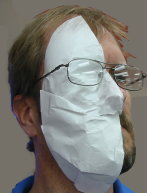
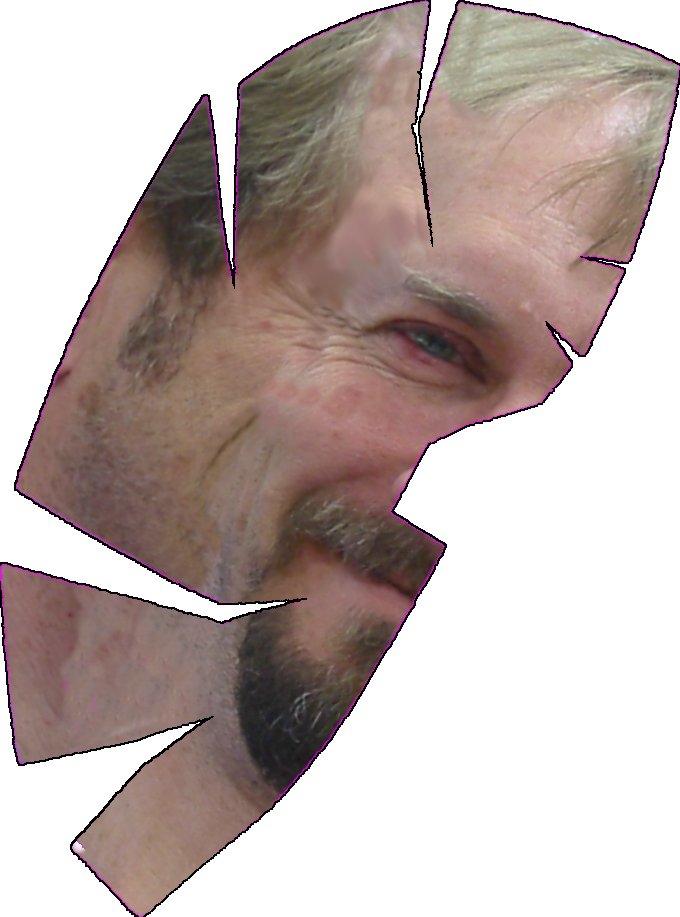
I took a big piece of paper and smashed/folded it against my face and applied tape all over to hold the folds in place and retain the basic shape of my face in all of the wrinkles in the paper. Then I cut the mask down the middle.
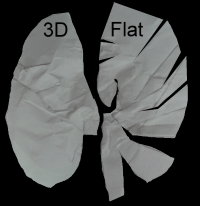
I made cuts at various places to enable the half to flatten out. I traced the flattened shape and created a mirror image of that.
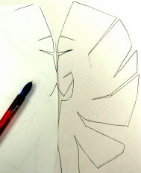
I folded and taped
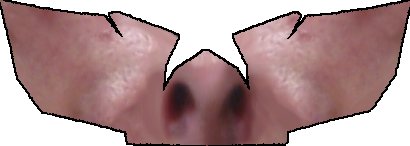
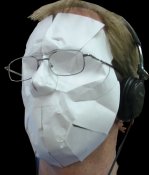 those pieces together and tried them out on my face. The nose part didn't work at all. I had to make a little nose by hand and tape it in place. But the rest looked pretty good.
But...the original tracing had far too many cuts. I wanted to simplify the pattern to make it easier for you to cut out and put together. So, I cut this current mask down the middle, flattened it with new simpler cuts and made one last tracing.
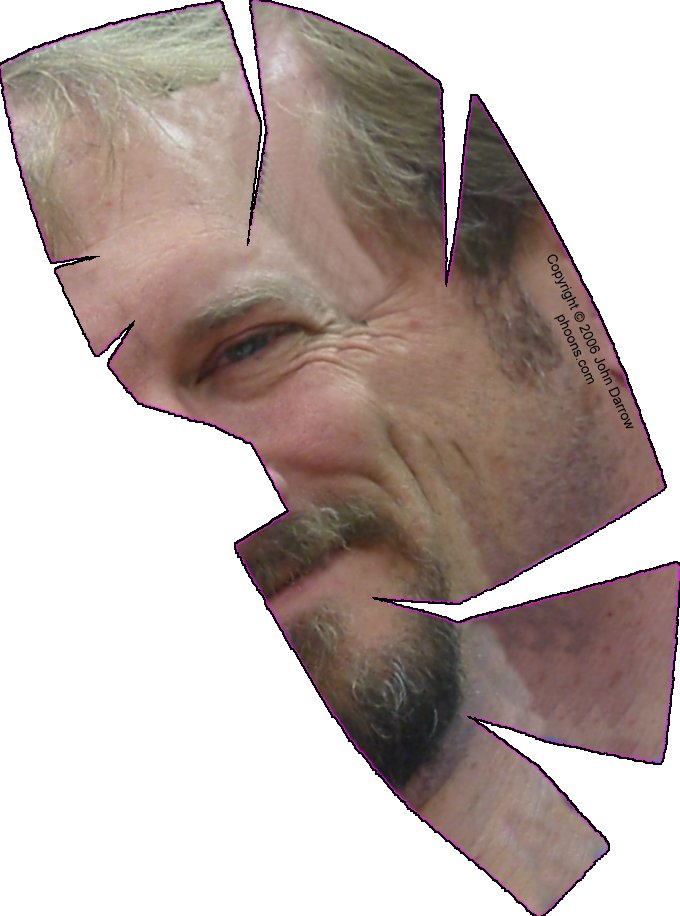
I then took photos of myself from various angles so that I could transfer key features from those images to the cutout patterns.
Oops. The nose didn't work out. Too complicated.
I used the same technique several years ago to make a pony out of chicken wire because I wanted to have a cool starting point for a topiary. I'd fold paper to form a pony-like shape, apply tape liberally, then cut it and flatten it out and trace a new pattern and repeat until I had a simple pattern that, 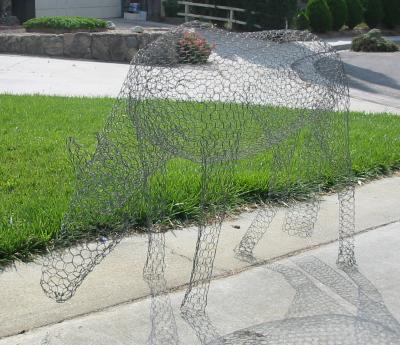 when joined together, looked pretty much like a pony. I laid those flat patterns on chicken wire, cut it up and wired it into the shape of a grazing pony. And that's how I came to have a chicken wire pony in my garage. Hmm.
![]()
![]()


Comments
Ok, that's really freaky lookin'. Will you stop staring at me???
:-)