Friday, August 10, 2012 : 4:23 PM

How to create your own sidewalk chalk drawing

You've seen those amazing chalk drawings. How do they do those? Can you create your own?

Here is one way you create your own. (Yeah, I've cheated by illustrating with gridline paper, but you'll get the idea.)

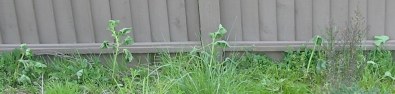
Step 1: Visit the location where you will eventually create your chalk drawing (the "sidewalk canvas"). Create evenly spaced grid markers along the periphery, markers that you can capture with your camera. Take a photo of the marked area from the angle and height that represents the best view of the to-be-completed project. Write down the actual dimensions of the sidewalk canvas. This is your reference perspective photo.

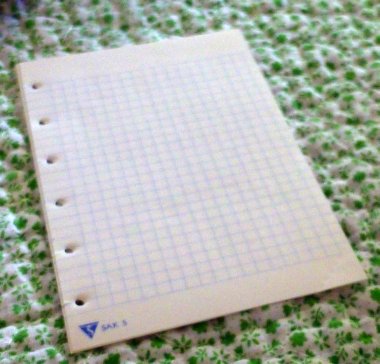
Step 2: With photo editing software that supports layers or transparency, add lines in a new layer so that the grid looks complete.

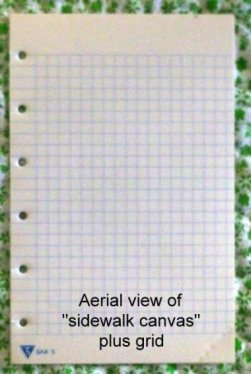
Step 3: Copy the result of Step 2 and stretch and skew it until it has the same aspect ratio as the actual sidewalk canvas. (Alternately, you could modify an aerial view photo from an internet map page so that it has a matching grid.) This is your reference aerial photo.

Step 4: In your reference perspective photo, insert a layer that shows your desired chalk drawing. Bottom layer: the photo of the site; middle layer: your proposed chalk drawing; top layer: the grid lines.

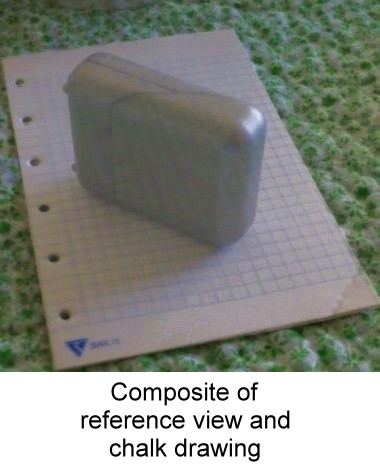
Step 5: Stretch and skew (a copy of) this reference perspective photo so that it matches your reference aerial photo.

In the illustration, the reference perspective photo is viewed on top of the reference aerial photo. The reference perspective photo is rectangle C and the corners of the grid are labelled B. The reference aerial photo is A. Goal: stretch and skew C until the B corners align with the A corners.

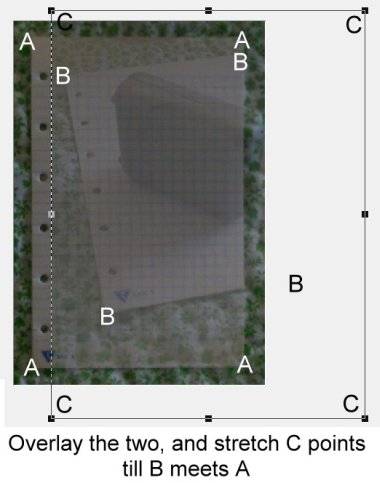
It took a lot of stretching an restretching to get each A-B pair lined up right. Note how skewed photo C became as a result.

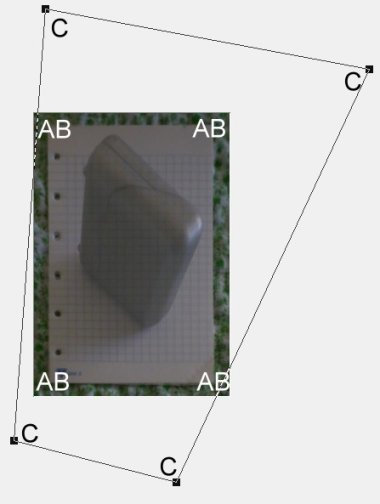
The result is your sidewalk canvas reference.

Step 6: On location, recreate the grid. Copy details from your sidewalk canvas reference to the sidewalk.

Step 7: If folks need to stand in a certain location to view your chalk drawing, consider providing a tripod that helps them know to "look from here". (If you printed this image, laid it on a table and viewed it from the correct angle, it would look like the object is sticking out of the table.)

Wednesday, September 14, 2011 : 12:20 AM

Installing my old Riven on Windows 7, 64 bit machine ... and running it without swapping CDs

I could find no way to get it to install on Windows 7, 64 bit machine directly. (Plenty of websites confirm it just won't work.)

But, I have a second computer with Windows XP on it and was able, with a bunch of extra steps plus USB memory, to get Riven onto my Windows 7, 64 bit machine. Sweet.

Normal installation on XP

I did a normal install of Riven on the Windows XP machine. That's the easy part (except, sometimes, for the QuickTime part of the installation, and perhaps the steps at the end of this post regarding "Skip" help in that).

Tweaks to enable running Riven without CDs

Then I enabled that machine to run Riven without my having to swap CDs:

- I opened two Explorer windows: one showing my Program Files\Riven\data folder, and the other showing the Data folder of CD 1.

- I copied the MHK file(s) from CD 1's data folder to the computer's data folder.

- I similarly copied the MHK files from the other CDs' data folders to the one data folder on the computer.

- I opened the riven.cfg file (Program Files\Riven) in an editor. About half way down is a comment that says "Data file sets". There are groups of *spit. Each has its own "Disc =" a number line. For every one of those, I changed the number to 0. That's it for Riven. It worked fine on the XP machine without the CDs.

Transfer to the Windows 7 machine

I moved the Riven folder from the XP machine to a USB device (I didn't have a big enough memory stick, so I used... my camera's memory!) and from the USB device to Program Files\Riven on the Windows 7 machine.

Install the ancient QuickTime

I viewed CD 1 on the Windows 7 machine, drilling down into QTWSETUP\WIN32\CUSTOM.

I ran QT32INST.EXE and selected Install and Start. It fails with "QuickTime for Windows has stopped working." I selected "Close Program".

I restarted the same QT32INST.EXE program and selected Complete and Start. It, too, fails. But stuff is being or has been installed.

I restarted and selected Skip and Skip All. (Is it checking for newer versions of the QuickTime pieces? Is that what's failing?) Skipping let me get a new Install button, and I progress, obtaining the desireable "red filmstrip" style progress bar and then a message of success.

By golly, my old Riven now works on my new Windows 7, 64 bit machine.

Multi-core machine?

Riven doesn't do well with multi-core. So, each time I start Riven, I have to view Task Manager (Ctrl-Alt-Del), right click the Riven process, select Set Affinity, waaaait for the window to appear, and unchecked all but one core. Then it doesn't crash randomly.

Saturday, April 16, 2011 : 10:45 PM

Where we planted geraniums

Each red dot represents where we planted a cutting. After my first pass at adding dots to the photo, I went with pen and paper to the slope to tally how many between curves (along the fence) and along the curves. I was stunned to discover that the count was more than double what I'd drawn. So, I added dots between the existing dots (a convenience for me compared to redrawing from scratch), a few dots short of reality. Man, what if all of these survive till next year and all bloom? That would be so cool.

See the upper right red dot? It's just beyond the wire fence. I was able to get one hand through a narrow gap, pound a hole and insert a cutting. Even if the rest get cut out, that one will remain beyond reach. :)

Wednesday, April 13, 2011 : 3:11 PM

Another Thai soup recipe

I think I like this recipe better than the version I posted a few years ago.


FOR STAGE 1
1 can coconut milk, then 2 cans water (or 1 can water, 1 can chicken broth)
1/2 t pepper,
1/2 t salt
1-2 chicken breasts
fistful of mushrooms, sliced

FOR STAGE 2
something hot-spicy (e.g. habanero sauce; 1/4t cayenne; 1/2 serrano, diced)
two med carrots, slivered or bias cut for visual
4 cloves garlic, chopped
2t (or more) fresh ginger, chopped
1/2 red bell pepper, slivered for visual
1/4 c lemon juice
2T cabbage, coarsely chopped

WHILE THE SOUP IS SIMMERING
fistful fresh basil, coarsely chopped
fistful fresh cilantro, coarsely chopped

---

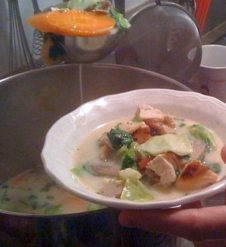
STAGE 1: Start heating a skillet to high. In a large saucepan, add the coconut milk, water, pepper, salt, turn up the heat to boil while you move to the chicken. In the hot skillet, sear the chicken on one side till it has some dark brown, flip briefly for slight cooking, but do not cook through. Cube and set aside for STAGE 3. Dry-sear the mushrooms in the chicken fry pan to reduce mushroom moisture, then brown with a tiny bit of oil or butter.

STAGE 2: While the mushrooms cook, do this for each of the stage 2 ingredients, in the order listed: prepare the item, then add it to the soup base. Reduce to simmer.

STAGE 3: Add the chicken and mushrooms to the soup base. Taste. Increase spiciness, lemoniness or saltiness as needed.

Right at serving time, stir in the basil and cilantro. Serve.

Tuesday, April 12, 2011 : 8:35 PM

Creating and editing webcam videos with Windows

So, you have a webcam and you want to create some simple videos and post them to youtube?

Recording with your webcam software

Your webcam probably comes with software that lets you record a video. Look for it.

Recording with (free) MovieMaker

If you couldn't find a video recorder that came with your webcam, let's see if your MovieMaker program lets you record video. First, see if you have this program: C:\Program Files\Movie Maker\moviemk.exe. If you do, run it and see if the File menu has the option named Capture Video. If it does not, you cannot record with MovieMaker.

Recording with (free) ManyCam

Download and install ManyCam (http://download.manycam.com/)

After you start ManyCam, you see an Effects tab. It has "Text over video". Uncheck the little box by Show ManyCam Logo.

Under the Sources tab, click Cameras and select your webcam. (Or, if you want to record what's visible on your Desktop, click Desktop and experiment with its options (Full desktop, partial desktop, custom desktop).)

Just below the video display, do you see a red "Rec"? Can you click it and start recording?

Editing a video with MovieMaker


[[to do: add basic split/delete steps]]

Adding words/titles

Split (Ctrl-L) where you want a title to be added. Highlight the segment after the split.
Tools > Titles and Credits.
Select "title before the selected clip"
Put text in the top portion if you want it big. Put text in the bottom portion if you want it to be a subtitle of the upper part or all on its own if you just want the smaller text.
Click Done
Click-hold-drag the right edge of the resultant clip to increase its duration upon playback.


Fading out

Right click the segment you want to fade out at its end.
Click Fade Out. (Similar works for "fade in" at the start of a segment.)


Adjusting the length of a segment without further splitting of it via Ctrl-L

Click the segment. It is "highlighted" as evidenced by the darker border on it.
Click-hold-drag either end of the segment and drag toward the middle of the segment to move that end inward. You can later drag that end back to its original length if you want.


Saving the project

File > Save Project
This lets you save the editing facts but doesn't actually create a movie.


Saving the project as a video/movie

File > Save movie file
My computer (next)
Provide a first name, and set the second box to Desktop
Either leave it as "Best quality" OR select Show More Choices and select High Quality, either Large or Small
Next or Finish...whatever it takes :)
Soon you will have a wmv file on your Desktop and you can upload that to youtube, email it, whatever

Saturday, March 19, 2011 : 4:42 PM

Geranium outing - part 2


Mom and I tromped through the weeds on this cold, soggy, rainy day, to enjoy blooms on some of the cuttings we planted in the last few weeks. With my additional weekend and midnight plantings, we're now up to 140. About 10 of those have bright blooms.


There remains a 30 foot stretch along the top end of the fence with no cuttings yet. Opportunity.

Saturday, March 12, 2011 : 5:36 PM

Geranium outing

A week ago, I went out at midnight and planted seven geranium cuttings near the Cupertino bridge walkway. It had been raining and the soil was softened--a bit. Using my palm, I would try to push a piece of rebar about five inches into the soil. The soil is hard there, and my palm hurt. I failed in several spots before finding seven places where I made decent holes for the cuttings.

A few days later, Mom announced 
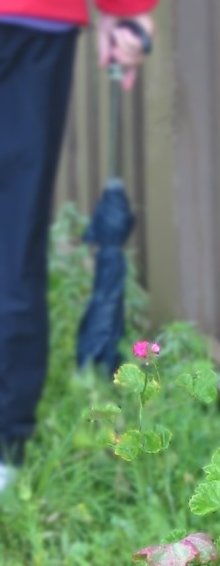
she'd pruned a bunch of her geraniums. She had filled a couple of buckets with cuttings that I could plant.


Today, we headed over to the bridge with the cuttings.

Mom prepped cuttings (trimming off lower leaves, etc) and laid them out every few feet.


This time, I brought a small sledge hammer to help me drive the rebar.

My technique was this: whack a hole with the short length of rebar, slip the cutting down the hole, whack the dirt next to the cutting (to collapse the hole and press the dirt more tightly around the cutting).

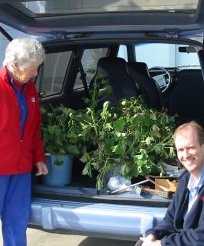
In an hour or so, we had planted 72 cuttings along the fence. We'll be back with more cuttings.

I think the abundance of grasses and weeds there right now will provide a helpful shade while these get started. I'm looking forward to seeing how quickly these bush out. Even more satisfying will be the pink and red blooms in the summer.